Pointillism Color and Share!
Description: Students will learn color theory and a method of making an artwork popularized in the late 1800s by Impressionists called pointillism.
Pointillism is using small dots or marks of color that are close to each other. When two different dots of color are next to each other and you view it from a distance they blend together. So, dots of yellow next to dots of red are seen as orange from a distance.
Pointillism is very similar to pixels that we see in images on computers. If you take a picture on a computer and enlarge it you will see small squares of color called pixels. Pixels are the smallest unit of a digital image or graphic that can be displayed and represented on a digital display device. For example the letter “W” and word “way” images are enlarged showing the pixels. You notice they are not all black. If you squint your eyes and look at this “W” and “way” at a distance, the letters look dark. The other colors you see are blues, tans, browns and violets of different values (lights and darkness); all blend together and become dark.
|
|
If you print a color photograph it is comprised of four colors called the “process colors”. They are magenta (red), cyan (blue), yellow and black. An artist that makes pixel like artwork using push pins is Traverse City, MI artist, Eric Daigh. See a short video on his push pin artworks: https://www.youtube.com/watch?v=3gYx9OjswQc
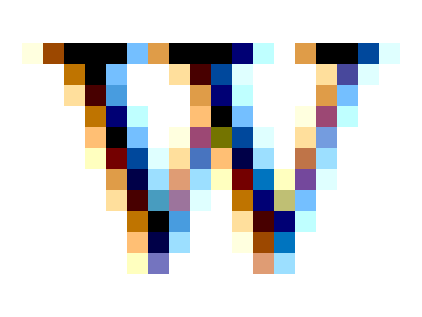
Chuck Close is another artist that uses the idea of pixels to make artworks. Here is a detail of a painting called Lucas by him. His paintings are very big. Visit his website at chuckclose.com
With this activity students will learn:
- how to use simple art making materials that are found at home.
- how to make small dots or marks of primary colors to make secondary colors.
- an Impressionist technique used by French artists Degas and Seurat in the late 1800s.
- how to make an artwork for your home!
- patience and discipline, because it takes a while to complete this assignment!
- decision making, knowing what colors to optically mix and how many dots it takes to get the right color.
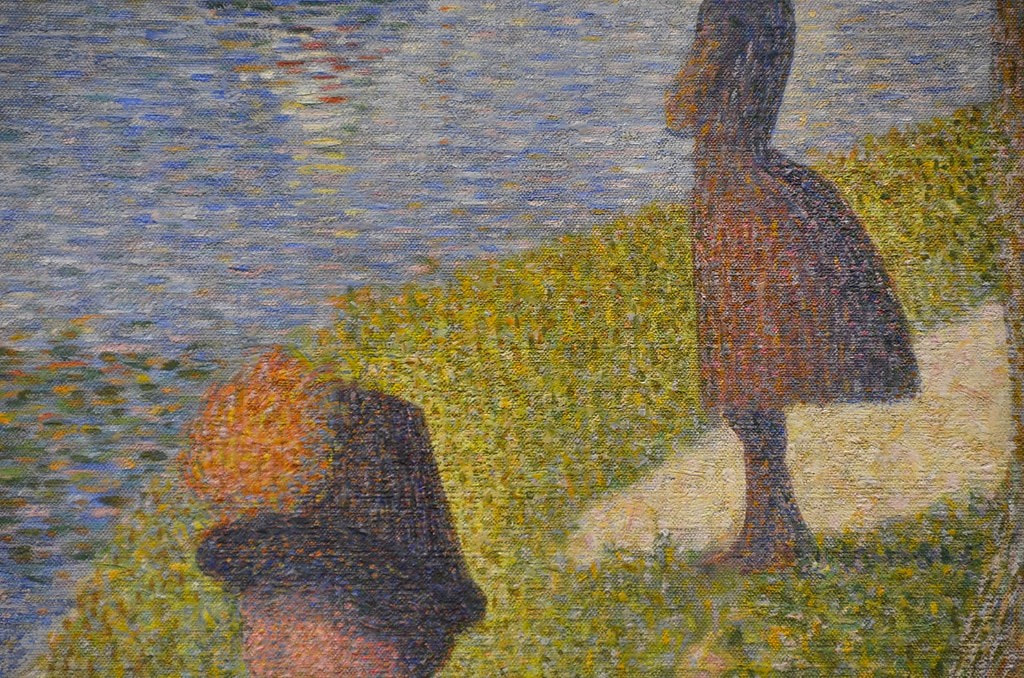
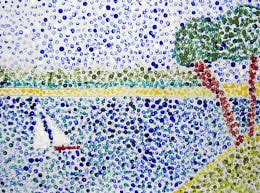
Close up of Pointillist painting from the Art Institute of Chicago
|
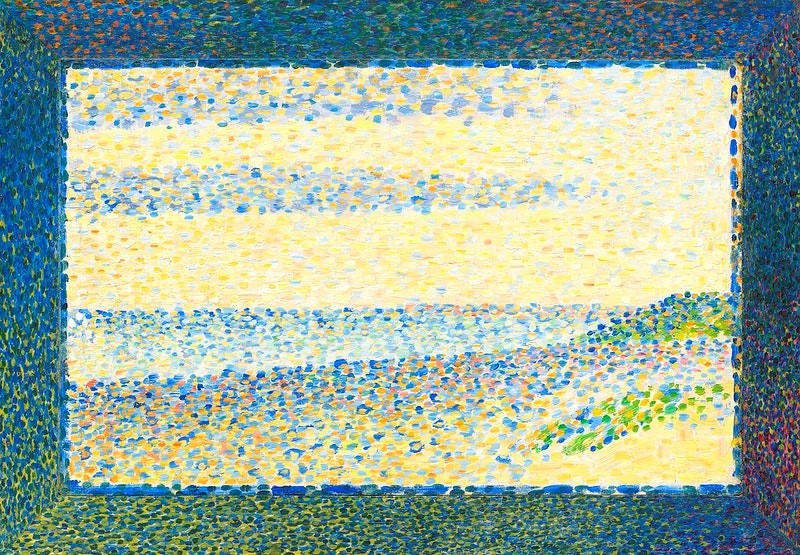
Pointillist painting by Seurat
|
Age level: 8 to adult
What you’ll need: Crayon colors red, yellow and blue, white paper, pencil. An alternative to using crayons could be Q-tips and red, yellow and blue tempera paint or red, yellow and blue markers.
Instructions
Let’s Play First! Before we begin let’s do some test examples with primary colors red, yellow and blue.
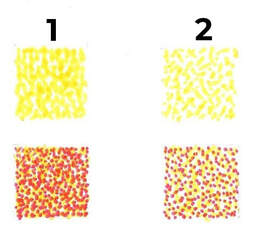
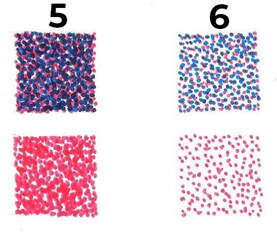
- Make six boxes about 1” square with your pencil.
- In box #1 make yellow dots close together and in box #2 make the yellow dots farther apart. See example.
- Then in box #1 make red dots on the dense yellow dots and eliminate as much white space as you can. See example.
- In box #2 make red dots over your yellow leaving white space showing behind both your yellow and red dots. See example.
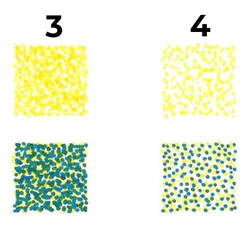
- In box #3 make yellow dots close together and in box #4 make the yellow dots farther apart. See example.
- Then in box #3 make blue dots on the dense yellow dots and eliminate as much white space as you can. See example.
- In box #4 make blue dots over your yellow leaving white space showing behind both your blue and yellow dots. See example.
- In box #5 make red dots close together and in box #6 make the red dots farther apart. See example.
- Then in box #5 make blue dots on the dense red dots and eliminate as much white space as you can. See example.
- In box #6 make blue dots over your red dots leaving white space showing behind both your blue and red dots. See example.
- Hang them up and stand back about 8 feet and look at them from a distance. What do you notice between the boxes with the dense color and the ones with the white still visible? The boxes with the white of the paper still showing looks lighter in color and the boxes with no white showing appear darker in color. You also noticed that two primary colors of red and yellow make the secondary color of orange. Primary colors red and blue make violet and primary colors of blue and yellow make green. The colors you made, green, orange and violet, are called secondary colors.
|
|
|
Creating your Masterpiece!
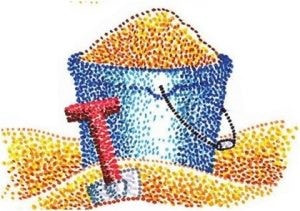
So what do you want to do? If you want to do a self-portrait, find a mirror and draw yourself. If you want to do a landscape look out your home window or find a picture of trees, lakes, and grass. If you want to do a still life find some things around the house and set them up as a display on a table with a tablecloth. Some things you can use are fruit, flowers, vases, pots, or anything you want.
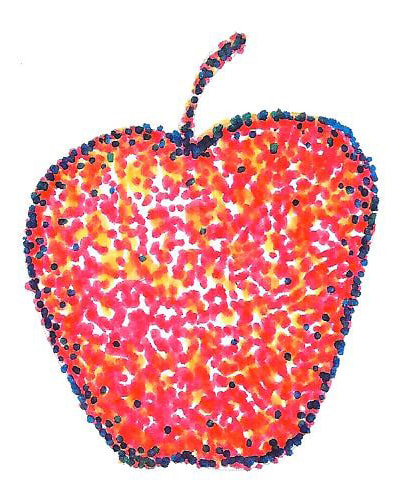
- Start by doing a light drawing of your subject with a light color pencil. Then look at your subject colors. If you have an apple which is red, then use dots of red and yellow. If you have any grapes that are violet, then use both dots of red and blue to make a violet. If you have any green, then use dots of blue and yellow. Continue until you’re are finished. If you want to know how to make a black or dark color use all three colors of red, yellow and blue. If you have white color in your subject, use the white of your paper.
- This apple below was created by creating a few yellow dots that showed a lot of white space. Then red dots where added that left very little white space. The red dots were most dense or heavy around the edges. Then blue dots were added around the outside edge of the apple and a very light amount near the outside edge to show the roundness of the apple and on the stem. Try to see if you can do this apple.
View these examples and remember to take a photo of your finished masterpiece and share it with the Museum on Facebook and Instagram hashtag #marshallfredericksmuseum.
|
|
|