From Drawing to Wire Sculpture
Marshall Fredericks made small scale wire sculptures and you can too! This sculpting activity starts with creating a 2D line drawing and then making your 2D drawing come to life as a 3D wire sculpture! 2D means the art is flat, such as a drawing on paper. 3D means art has length, width and depth and pops out in space!
Grade level: 8th to 12th grade and adult
What you’ll need:
Safety tips: Be careful to not poke your eyes or someone else’s eyes with the wire. Don’t wrap the wire tightly around any body parts.
We will begin this activity by doing a drawing first (Part I) and then create a sculpture from the drawing using easy to bend wire (Part II).
Instructions
Part I: Create a line sketch
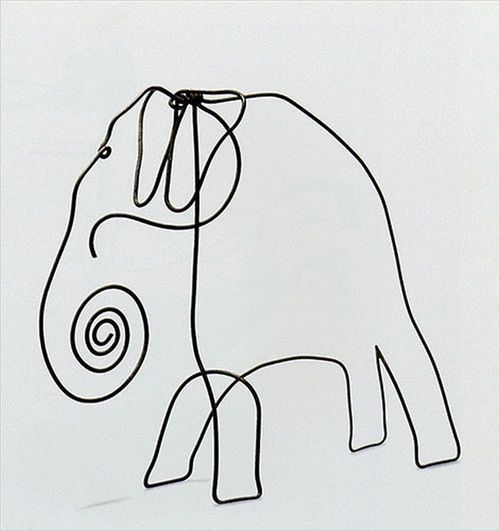
1. Research artist Alexander Calder at www.calder.org. Calder did many wire sculptures of animals and circus imagery. See his elephant below? Search the internet to see how many other artists you can find who have used wire to make sculptures!
2. If you need to get some ideas for your drawing/sculpture go to the Marshall Fredericks Sculpture Museum Virtual Tour and select a sculpture you would like to create.
Grade level: 8th to 12th grade and adult
What you’ll need:
- Computer or telephone wire or any easy to bend wire that can hold its form
- Paper
- Pencil
- Tools or objects to shape wire (optional)
Safety tips: Be careful to not poke your eyes or someone else’s eyes with the wire. Don’t wrap the wire tightly around any body parts.
We will begin this activity by doing a drawing first (Part I) and then create a sculpture from the drawing using easy to bend wire (Part II).
Instructions
Part I: Create a line sketch
1. Research artist Alexander Calder at www.calder.org. Calder did many wire sculptures of animals and circus imagery. See his elephant below? Search the internet to see how many other artists you can find who have used wire to make sculptures!
2. If you need to get some ideas for your drawing/sculpture go to the Marshall Fredericks Sculpture Museum Virtual Tour and select a sculpture you would like to create.
3. When you have an idea, start to do a simple line sketch/drawing on paper with pencil. See how simple the Calder elephant is created in wire?
4. Keep in mind you can make a relief sculpture that can hang on a wall or freestanding sculpture that can be placed on a table and viewed from all angles.
Part II: Make your drawing into a wire sculpture
1. Begin to turn your 2D drawing into a 3D wire sculpture. Find a good starting point on your drawing like the end of a foot or making a body form and building from that. Think of your wire like the lines on your drawing. If your line curves, then match that curve with wire. You can also put your wire directly on the drawing and use it as a guide!
Some tips when sculpting
- Feel free to cut and join separate wire pieces to make it larger or smaller in relation to your drawing.
- Use your pencil as a tool to shape and bend the wire.
- You can follow your drawings closely or make changes as you progress.
- You can be simple or wild and crazy with the wire!
- If your wire has color think about them as part of the composition.
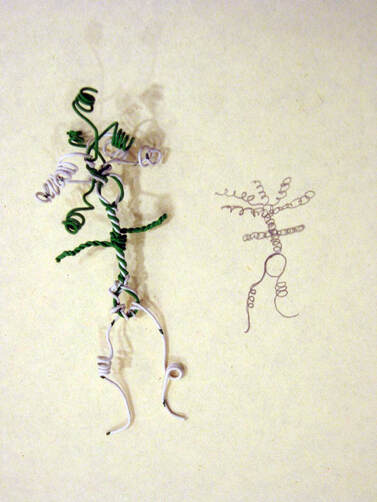
The photo example shows the drawing on the right side and the sculpture to the left. See how the sculpture is larger in proportion to the drawing? Notice how the artist used green and white wires and balanced the colors? If you look closely, you can see differences and similarities with the drawing and sculpture.
Share this! Please share your creations on Facebook and Instagram using the hashtag #marshallfredericksmuseum.


